

 NEW ARRIVALS
 BEST SELLERS
 SUPERSKIN™
 COURSES
 GIFT CARDS
 The MyFAK Collection
 Specialty
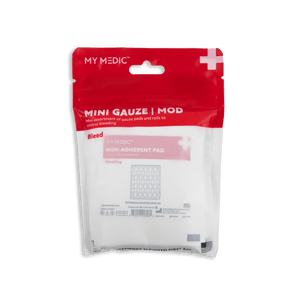
 BLEED
BLEED
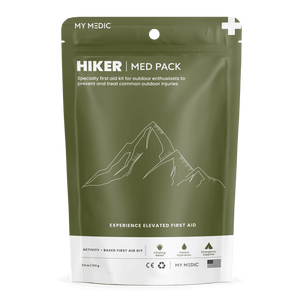 OUTDOOR
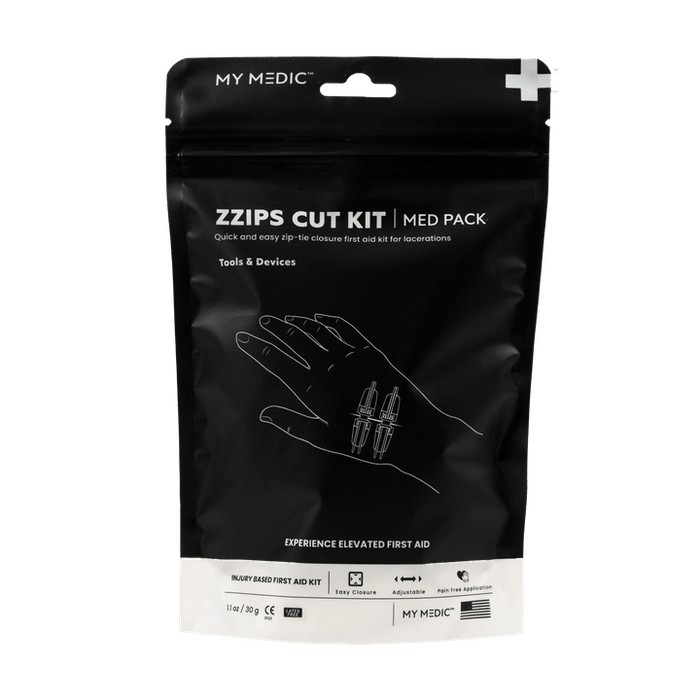
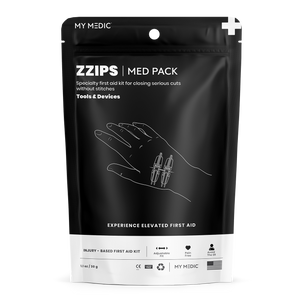 TOOLS & DEVICES
 AIRWAY
 BLEED
BLEED
 OUTDOOR
 BURN
BURN
 TOPICAL
 MEDICATION
 SPRAIN & FRACTURE
 HYDRATION
 TOOLS & DEVICES
 Supply Categories
 Top Sellers

Survival Situations - Mountains
If you're a mountain lover without the experience of a mountaineer, you need to know how to survive in this terrain. Hazards you can encounter include avalanches, bipolar weather, and thinning oxygen. While (usually) not as treacherous as jungle survival, a lack of knowledge, poor choices, and panic can endanger your life in the mountains.
Supplies
Preferably, you would have a handy dandy, life-saving survival kit with the following supplies to help you stay in one piece.
Insulation
You wouldn't go paintballing without the protective gear, so why would you venture into the mountains without the proper insulation? The higher into the mountains you go, the colder and wetter it will be. To stay warm and safe, you need to have an extra layer of clothes, a space blanket, and some spare socks.
The temperature may also be sweltering depending on when you're in the mountains. In this case, you may want to throw a hat and a pair of sunglasses into your survival kit. No reason you can't look like a boss while trekking back to civilization!
First Aid
If you only want the general, basic first aid supplies, you’ll need the following materials:
- Bandages
- Blister strips
- Gauze
- Ibuprofen
- Triple Antibiotic Ointment
- Tweezers
- ZZIPS
However, you never know what will happen to get you stranded. Maybe you were lucky and floated safely in with a parachute. Or, if you're unlucky, your car went careening off a cliff—the joys of modern technology. If you want the medical supplies that will keep you alive in dire situations, you'll need a tourniquet, chest seals, hemostatic gauze, and an emergency pressure bandage in addition to the basics. To ensure you're as prepared as possible, I'd recommend grabbing yourself a large ifak kit before going adventuring.
Water

Just about any water you find in the backcountry should be purified in some way for safety. And to purify your water, you should carry at least two purification methods. Lifestraws, Aquatabs, iodine tabs, and bleach (2 drops per quart) are all compact, easy-to-use methods you can rely on. If you don't have any of these, boiling the water for around ten minutes will also work.
Food
While ideally you'd be rescued before you have to start scrounging up food, it may not happen. Keeping some basic rations in your survival kit will save you a lot of trouble. Anything from hiker meals to trail mix will work as long as you keep your survival kit light. It's even better if your food has a higher salt content to help you avoid dehydration.
Orientation
Phones are excellent for navigation (I should know, I'd still be lost in Oregon without it), but there's no guarantee there will be service in the mountains. If there is, call for help and don't move. You'll be outta there in a jiffy. In the tragic circumstances where there's no connection, topographical maps and compasses can make navigating your way out a thousand times easier. It does require you to know how to read a topographic map, though.
Signaling Devices
Hopefully, someone will have realized you are missing and where you might have ended up. If that's the case, stay put as much as possible so it's easier for searchers to find you. However, having a signaling mirror, emergency whistle, or even a flare handy will make it easier for people to find you even if no one knows about your disappearance. If you don't have a dedicated signaling device on hand, you can use shiny wrappers and space blankets to redirect light, arrange stones to spell SOS, or use small strips of your space blanket to mark your direction.
Tools & Gear 
Sometimes, having even one more item at your disposal can make your life much easier. For example, knives, multi-tools, paracord, and fishing line/hooks are fantastic multi-use items you can use for everything from hunting to constructing shelter.
Shelter
In the mountains, you will primarily need to shelter yourself from the wind, weather, and chill. A waterproof tarp is a fantastic resource to include to keep you protected from the elements. If a tarp is too bulky to fit in your survival bag, a bivvy, while not as thick or durable, will keep you warm and sheltered.
Light & Fire
Every survival kit needs a flashlight or light source of some kind and a few ways to start a fire. While not recommended, you may need light to move at night, and a fire will keep you warm and cook any food you happen to catch.
Miscellaneous Gear
The higher the altitude, the less atmosphere those blessed rays of sunshine have to travel through to burn the hell out of you. In order to avoid a crispy fate, I would strongly recommend sunscreen. It's miserable dealing with sunburns in typical, nonstressful situations. Imagine how awful it'd be in a survival one! Other useful gear you need on hand is a plant identification guide/foraging manual, survival guide, fishing hooks (if you don't want to make your own), and bear spray.
Getting Food, Water, & Shelter
Your chances of survival without food, water, and shelter are about as likely as the Cowboys are to win the Superbowl (I'm from Dallas, I can make fun of them). These should be your top priorities besides keeping yourself safe from mountain regions' various dangers.
Finding Food
Fishing in the Mountains
As long as you find a large enough body of water, fishing should be relatively easy using a spear or hook (unfortunately, you're unlikely to have the materials for fish narcotics in the mountains. Learn more about this in Survival Situations - Jungle).
WHERE TO FISH

Any lake, river, or stream large enough for fish to live in is a possible fishing location. Don't venture too high into the mountains, though. Very few fish can withstand the cold that comes along with high altitudes. Instead, consider heading down into the valley where fish will be more plentiful.
LINE & HOOK FISHING
Even if you don't have fishing hooks or a dedicated line in your survival kit, you aren't doomed. You can use pretty much whatever material is on hand for the line so long as it is thin and strong. This can be wire, agave fibers, braided bark strings, the 'guts' (insides of) paracord, or even a hoodie drawstring (although it might be a bit short). Use your ingenuity!
Fishing hooks are ridiculously easy to make. If you have some random supplies lying around, you can likely fashion a hook. Here is a list of items you can turn into a hook with some finagling or shaping:
- Bobby pin
- Bone
- Paperclip
- Safety pins
- Soda tab
- Stick
- Thorns
- Zipper
As long as you put your mind and your multi-tool to work, you can make a hook!
SPEARFISHING
Spearfishing takes some practice, but as long as you get this right, you'll be the manly Tarzan to whatever Janes are stranded with you (or whatever survival couple you're into. I'm open to suggestions).
Spears are probably the easiest to throw together and are suitable for hunting other creatures and self-defense. To make your spear, grab a sturdy branch that's an adequate length and pick the kind of point you want. For something nice and simple, sharpen the end, and bada bing bada boom, you're ready to get stabbing! You can attach your knife or a sharpened stone if you want something sharper. Lastly, it can be challenging to stab the fish, and even if you hit your soon-to-be dinner, the fish can slip off or wiggle away. To help increase your chances of stabbing the fish and keeping it on your spear, fashion a mini trident at the end of your spear or add more points. Just make sure it's secure!
While spears are incredibly handy, fish can see a lot more than you may think above water. Keep your shadow off the water and stay relatively still while you wait for a fish to swim within reach.
GENERAL FISHING TIPS

- Don't eat dead fish you didn't kill. They may be riddled with sickness and disease
- Fish like shiny things! Attach something shiny (such as buttons, buckles, or wrappers) to your hook, or use something reflective to redirect sunlight onto the water
- In hot weather, the fish will be deeper in the water. When it's cooler, they'll be in the sunny shallows
- Some fish will be more active during the dawn and dusk. Fish at these times
- Ensure you cook your fish thoroughly. You never know what germs or parasites could be inside
Hunting
There are two ways I would recommend hunting. The first would be to pull out your survival guide and build a suitable trap using your supplies and the wildlife signs around you.
There are a billion and two ways to make a trap but the one I will recommend is for smaller critters - a pitfall trap. Dig a hole at least 3 feet deep with vertical sides in a flat, vegetated area. You can also imbed sharp spikes at the bottom of the hole to kill or injure the animal when it falls in. Once you have your hole, disguise the opening with leaves, sticks, and other natural materials. Bait the trap using food the hunted animal you're hunting would typically eat. It is important to note that wild animals are wary of humans and the scent they give off. Handle the trap materials minimally or use smoke to disguise your scent to avoid scaring them off.
The second hunting method I recommend is using the handy dandy spear you built. However, this should be a last-ditch effort as it requires a lot of time, energy, and patience on top of the risk of getting lost. Depending on how motivated you are, though, you might be able to catch something! Just be sure to stay downwind, mask your scent in some way (smoke works here, too), and be careful! Don't go after anything beyond your abilities, and keep an eye out for animal and environmental dangers.
Foraging
Here's the down and dirty for foraging. Unless you know exactly what you're doing, don't just eat any plant you come across! Take your foraging manual or plant guide and look at the plants around you. Some are edible as they are, while others are poisonous unless cooked. Still, others have certain edible parts, while everything else has no problem destroying you from the inside out. There are all kinds of things in nature that you can eat, but many of those have poisonous copycats. Never put anything in your mouth if you aren't entirely sure what it is.
For those of you who will inevitably ignore (or forget) this advice, at least abide by the following "Do Not Eat Under Any Circumstances" list.
Do not eat any plants that have the following characteristics:
- Skin contact causes rashes, tingling sensation, or redness
- Dull colored leaves
- Shiny or glossy leaves
- Soapy taste (don't put random things in your mouth)
- Strong smell
- Looks kinda sketchy (better safe than sorry)
Finding Water
Thankfully, water shouldn't be too difficult to find in the mountains. You can collect it from lakes, streams, and rainfall. However, water collection can vary depending on the season. During the winter, you should melt ice for water. Ice melts faster and provides more water than melting snow would. In the summer, all you need is a bit of setup, and then the sun will do all the work for you.

A solar still, also known as a vegetation still, is used to suck the water out of the natural environment using a bag, some stones, plants you stick in said bag, and the sun. You can wrap the bag around green vegetation or place vegetation inside the bag, throw a rock in if the bag is on a branch so the water has somewhere to collect, tie off the bag (either with paracord or tightly around itself), and place it in direct sunlight for a few hours. The water within the plants will begin evaporating, and the bag will catch it. The only downsides of this method are that it can take a while, the water will taste like whatever plants you use (gotta love that hot leaf juice), and the plant might die. However, when you've got to choose between yourself and a plant, dead plants are a win.
After you have water, you still need to filter or purify it. If you pull your water from a puddle, lake, or river, you should always purify it to be on the safe side. The easiest way to cleanse your water would be to pop in a chemical purifier, such as Aquatabs or iodine tablets, or boil the water for ten minutes.
Shelter
Even if the day is warm, there's no guarantee that the night also will be. To avoid the unpleasantness that is hypothermia, you'll need to, at the very least, have a shelter and, at most, know how to heat said shelter.
Natural Shelter
Occasionally, you won't have time to build a complete shelter or just need something to hunker down in for a bit. Hollow trees, caves, rock formations/overhangs, thick brush, and densely forested areas can all be life-saving, depending on what you need shelter from. Some will give ample protection from the wind, while others will shelter you from the rain. Just be sure to check any shelter carefully for critters and sharp objects. Unless you're a glutton for punishment, there's no need to cause yourself more grief.
Weather Specific Shelters
Depending on the temperature and weather, you'll build a different shelter. An A-frame shelter is fantastic for just about any climate and temperature but relies on your ability to collect enough materials. A snow cave shelter only requires horrendous amounts of snow (I hate the cold, if you couldn't guess).
Building an A Frame Shelter

An A-frame shelter is one of the easiest shelters to put together in wooded areas. The denser the trees, the more materials you have access to! To build one, you'll need the following materials.
- 2 Forked branches or a tree with a branch the height you want your lean-to OR a tree limb at the correct height
- 1 Branch the length you want your shelter to be
- Enough twigs, sticks, or logs to line both sides of your shelter
- Insulating material to cover the shelter (foliage, clay, animal skins, moss, snow, etc.)
- A tarp (if you have one)
Take the forked branches, lean them against one another, and place the length branch between them to construct the frame of your shelter. Wedge all the edges firmly into the ground for stability. If needed, you can use paracord to tie everything together. If there's a tree branch at the height you want your shelter, you can skip the forked branches and lean the length branch against the tree. Line the sides of the frame with the sticks you've gathered. If possible, place these at a steep angle slanted in one direction. This will make it sturdier and more waterproof. Take your small twigs and stick them in any gaps you come across. Pack dirt or clay around the base to make the shelter extra sturdy. To insulate, layer your chosen materials onto your new home, starting from the ground and moving up. Evergreen boughs are a fantastic insulator and should be taken advantage of. Whatever insulation you use, be sure to pile on copious amounts. The more insulation, the cozier you will be. If you have a tarp, throw it over the top of the completed frame and pin it down with rocks before layering the insulation.
Digging a Snow Cave
Snow drifts have two (2) uses: sledding and snow caves. Since you're unlikely to be enjoying snow sports if you're stranded in the mountains, that leaves you with one use. Snow caves will protect you from the elements, give you a place to sleep, and a safe place to set up a fire (on the condition that you build this correctly). Of course, if you have a shovel, use that, but you can dig one out using your hands, a branch, or other kind of makeshift tool.

To build your snow cave, find a location with a reasonably large snow drift about six to ten feet deep. The deeper the snow drift, the larger the cave you can carve out. A snow cave generally has two to three layers, a vent, and a domed roof. The lowest layer is the entrance and is where cold air collects. The second layer is your sleeping shelf. The last layer is an optional shelf where you can build a fire. The vent allows carbon dioxide to safely exit (you're trying to stay alive here, after all), and the domed roof helps keep the snow from dripping on you when the cave warms up.
Dig straight into the snowdrift and start digging a tunnel. After you have a tunnel a few feet in length, begin digging up to create your sleeping shelf. The floor of this shelf should ideally be at least 6 inches and at max higher than the entrance tunnel to better trap heat. After you've made the shelf large enough to sleep on, dig the last layer for your fire. Carve a few feet upwards in a dome so that you have a little extra space and smoke from the fire has room to rise. Lastly, poke a hole up through the snow to the surface. Clear the ventilation hole regularly so snow and ice don't clog it. When inside, sit on your survival pack or space blanket to help insulate yourself from the snow beneath you.
In a pinch, a shallow snow cave can be dug so you can enjoy a short rest (as much as possible in a frozen wasteland) in a sheltered environment.
Heating Your Chosen Shelter (non-flammable ones at least)
Unfortunately, if you're hunkering down in a bush or built yourself an A-frame, you can't have a fire inside without obliterating your cover and yourself. What you can do is construct a fire outside the entrance of your shelter. If you want to go a step further, erect a heat reflector to bounce the heat back towards you by stacking stones or logs on the far side of the fire.
Dangers You May Encounter
No matter where you go, you can't completely avoid danger. Instead, you can take steps to prevent and prepare for the possibility.
Creatures
We'll be covering four main creatures today: pumas, bears, snakes, and scorpions. You heard that right. Scorpions are in the mountains, too (I swear there's no escape from these mini monsters).
Pumas
When you come across a mountain lion, back away slowly, stand straight up, and maintain eye contact. Do not crouch, bend over, or run. If the lion starts coming toward you or acts aggressively, wave your arms slowly and raise your voice to appear larger and more hostile. Throw whatever's in reach at the cat. If it attacks you, fight back using whatever you have on hand. Bear spray does work effectively on cougars, but if you forgot that at home, people have fought off cougars using jackets, rocks, and other random items. Defend your head and neck as pumas aim for these areas.
Bears
First things first, if you see a bear with her cubs, do not approach unless you want to be turned into minced meat. Bears with cubs are extremely hostile and will not hesitate to come after you. Besides that, there are a few things you need to know about how to fend off certain bears and what to do to prevent them from storming your campsite.

GRIZZLY & BROWN BEARS
If a grizzly attacks, play 'possum' (dead). Fighting back may escalate the situation and make it a more dangerous encounter. Instead, lay face down on the ground, place your hands behind your neck, and spread your legs so it's more difficult for the bear to turn you over. Stay as still as possible until the bear leaves. Only fight back if the bear is persistent in its attacks.

BLACK BEARS
You know the whole play-dead thing? That does not apply to black bears. Thank heavens these bears are a different color than grizzlies! Just kidding they come in all kinds of different colors so don't depend on color! Try and make yourself appear larger by waving your arms and shouting. If you have a secure location nearby, such as a car, hightail it out of there. If the bear closes in on you, aim your attacks at its face.
HOW TO TELL THE DIFFERENCES BETWEEN BLACK & BROWN BEARS
Both brown and black bears come in a multitude of colors, which makes their names aggravatingly useless when it comes to differentiating them. To tell them apart, remember that black bears are generally smaller in size and have bigger ears that stick straight up, whereas brown bears are larger, have smaller, fuzzier ears, and have a large shoulder hump.
TIPS FOR ALL BEARS
- Bear spray works on bears (shocker), so keep a can within reach
- Unlike pumas, you shouldn't make eye contact. Bears see this as a challenge
- If you're attacked in your shelter, fight back
- Hang unsealed food in a tree from your paracord
- Don't set up camp near bear signs (tracks, claw marks, torn apart logs, etc.)
- If a bear stalks you, be prepared to fight back regardless of the kind
Snakes
Some mountain ranges like the Rockies have garter and rattlesnakes, whereas the Blue Ridge Mountains have a list of snakes the length of your arm. It is vital to give all snakes a wide berth and wait for the snake to leave. Don't attempt to move, attack, or scare it off. This is even more true if it is a venomous snake so steer clear!
Scorpions
If you find a scorpion in your shelter, burn it down and build a new one…It's beyond salvaging. Just kidding, but seriously, keep an eye out for them. Scorpions are primarily nocturnal and may sneak in during the night. If it's cold, you might just be in luck! Scorpions hibernate during the winter, and you won't see leg nor stinger of them. For those with rotten luck and find themselves living with one of these freaky little devils, you have options! You can:
A - Burn down your shelter and move (this has my vote)
B - Crush it with a rock
C - Place a container over it for safe relocation (PETA would be proud)
D - Eat it after you've cut off the stinger (I've been told they're "good" roasted. I am skeptical)
Weather
One minute there won't be a single cloud in the sky, and in the next, lightning's striking way too close for comfort. Welcome to the weather; it flip-flops between pleasant and deadly like a fish out of water. The best way to deal with the weather is to be prepared with extra layers, shelter, and caution. Just an hour's worth of rainfall could cause rivers to swell dangerously or mudslides to start. Be aware of possible dangers in your surroundings and watch the weather.
Avalanches
Sadly, avalanches are always a danger no matter what season it is. The season will determine whether the avalanche is made of rocks or snow. To avoid snow avalanches, avoid steep slopes, stay on the windward side of ridges, and avoid slopes that don't have any trees. If you hear a hollow, thumping noise while walking, that area isn't safe and may turn into an avalanche. To avoid rock avalanches, stay away from slopes that are between thirty-five and forty-degree angles.

When caught in an avalanche, rock or snow, grab onto anything solid nearby, keep your mouth shut, and clench your teeth. If you start to get swept away, use a swimming motion to avoid sinking into the debris and head towards the avalanche's side to try and escape the pull.
Not Quite Dangerous, but a Major Annoyance
Altitude sickness is generally a miserable annoyance rather than dangerous. If you have any of the following symptoms, you may have altitude sickness:
- Headaches
- Nausea
- Dizziness
- Loss of appetite
- Difficulty sleeping
- Fatigue
To treat, stop ascending until the symptoms pass or descend a bit. Rest and pain relievers will also help alleviate the symptoms.
Navigating Your Way Out
Mountains are rugged terrain that requires a lot of situational awareness to keep yourself safe. If at all possible, avoid scaling up or down cliff faces. Find a more gentle slope that you can hike down and follow trails, roads, and rivers downhill. You'll have a much higher chance of finding civilization this way.
What to do BEFORE You Go Literally Anywhere (Pre-Survival)
If you get stranded somewhere, you'll definitely want a rescue party. Even if the probability of getting marooned is infinitesimal, you should still follow the following tips to keep yourself safe.
- Tell someone where you're going, when to expect you back, and who to call if you aren't back on time or are out of contact
- Try to avoid going anywhere remote alone
- Check the weather before you go and prepare accordingly
- Be situationally aware
- Obey any trail signs you come across
- Remember, the road less traveled isn't always the smartest choice. Especially if your navigation skills are lacking
- Charge your damn phone. Despite people practically living on them, they always seem to be low on battery when you need it
Mountains are beautiful works of nature but require adequate knowledge and gear to traverse safely. Take your time planning any mountain excursions so you can enjoy them without any mishaps. If you don't have a first aid kit, pick one up now so you won't regret it later!


Leave a comment